
As Seeker, one of my more important tasks involves a photo montage. As a photographer and web designer I must confess...I hate to see a beautiful project go to waste on an awful photo. I'm here tonight to give you the best tips I've learned over the years to really show off those stitches you slaved over. Not to mention...its no secret that the better looking photos tend to get higher grades...they just present better!
FIRST, PRESENTATION:
Whenever, WHENEVER, possible...get something alive in your shot. For anything that can be worn by a person, shoot the picture of a person wearing it. For anything not to be worn, find a small child or a cat to hold it. Bring some life into the shot. Clothing demands humans, supply it with them and your project page will pop with life. Put those socks on some feet! Steal somebody's kid to cuddle that stuffed animal! Pile scarves on your cat! Anything! I don't want to see flat socks...ever!
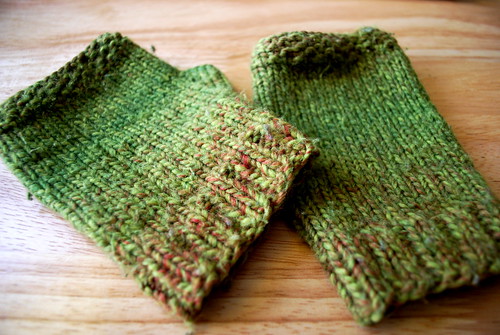
For a knitting project, I suggest presenting at least two photos on your Ravelry project page. In photography, there's what's called the "hero shot" and the "style shot". Both are great for really showing off a project. The hero shot is a picture that contains your project, uncluttered and clearly shown. This is your mittens against a simple back ground, your sweater on a person standing straight in a basic pose, this shot shows what you've got. This is when you want to feature the true color, the interesting sleeves and so on.
Here's a hero shot of my "Irish Pubs Are Cold" fingerless mittens:
Then there's my favorite, the style shot. This is your Slytherin scarf draping over a velvet cape clad shoulder, your toy set up in a cute scene, your potions book covering on a candlelit desk. The shape and color of your project isn't as important as the mood you want your project to have here!
Here's my style shots:
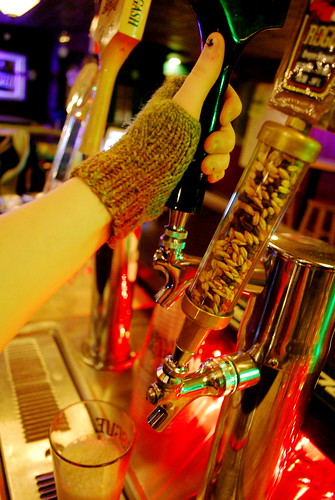
And:

Now are these mittens exceptionally better than anything else in a pub? No...but I knit enough fingerless mittens that having a different mood to these make the project more interesting to share. I get PMs from people asking for the pattern despite there being a thousand fingerless mitten patterns out there because the mood in the pictures strikes a chord. Think of knitting magazine layouts, is that sweater really THE ONLY SWEATER TO LOOK GOOD ON A BOAT? No! But if you're somebody who looks at the picture and thinks: I could be like that fun and adventurous boat lady, you're more likely to knit it.
This is definitely true with some things more than others. Handknit socks flat are not very attractive but its amazing how much that changes when you put them in a person and then put that person in somewhere interesting. Browse a sock pattern book sometime, you'll see all kinds of different scenes to inspire a mood. Feet look like feet most of the time, but sock designers are always coming up with a way to make these feet more worth buying the pattern for than those feet and let's be honest. IT WORKS.
For things that aren't obvious, like a hat which tends to be the same size as most hats, include some contextual item, preferably something in relation to the object. Did you knit a tiny blueberry muffin? Go to the store and pick up some real blueberries for the shot. It'll show the size and be cute...and cuteness is always graded highly.
Try out different settings, sometimes you might want to take a project out about the town to find a place to add something to the shot. I've had lots of luck with finding another local knitter in need of project shots and the two of us making an afternoon adventure out of a backpack full of FOs, several coffees and a camera. Sometimes you can even find a budding photographer who will trade some semi-professional looking photo shoots for a pair of socks. It may seem like a lot just to show off a project, but it'll make those OWLs look amazing!
Did I mention, always put clothes on something living?
Okay, time for TECHNICAL BITS:
I can't say it enough...natural light, natural light, natural light.
Natural light will make the colors in your project truer and more vibrant. While sunlight is amazing, you do have to watch out in direct sunlight. You can get a glare, especially in glossy yarns that is unflattering. I find a slightly overcast day is great and a sunny windowsill is better...because I don't have to go outside.
So even if you cast off from that shawl at 3am and want to turn it in RIGHT NOW, be patient. Your knitting will thank you later if you show it in the best light. A built in flash is made solely to trick the world into taking bad photos...I swear, professional photographers pay camera companies to trick people into using them so nobody will ever realize how simple taking a good photo can be.
Now, for advanced lighting or people who don't want to wait or for vampires really into showcasing knitting, you can build a lightbox. They do wonders for stash photography and really showing off handspuns. Here's a great how-to for making a cheap one: http://www.strobist.blogspot.com/2006/07/how-to-diy-10-macro-photo-studio.html
Once the lighting is good, you want to crop it like its hot. Keeping the camera steady, get in close for some shots. Try out the Macro setting on your camera! (Its the little flower.) You spend time making gauge, practicing your stitches, and maintaining tension so why would you not get in close to look at them? Knitting and crochet are beautiful when they're finished and where else except on Ravelry can you know everybody who looks at it will truly appreciate that beauty? If you're doing something with complicated stitch work, you should always try to have at least one shot showing that off in detail on your project page.
Take elevnty-billion photos. If your camera is digital, there's no reason to settle for an "okay" shot. Take a hundred if you must! You can sort them on the computer later and narrow it down to an amazing handful. Its much easier to find the winners in a big batch then to settle for the most decent in the four pictures you took.
Edit them in Picnik if you don't have a photo editing software. Its free, amazing and works great with Flickr. Play around with it a bit to see how it feels. If you're following the above steps, you shouldn't need to do much other than occasionally cropping in closer or adjusting the temperature to match the scene.
Um...I feel like I had more but that's all I can think of right now. I want to see uniform montage photos that will put Ansel Adams to shame! Feel free to burn me with any photography questions!
RESPECT YOUR KNITTING, GIVE IT THE PHOTOGRAPHY IT DESERVES.
One last thing...be grateful you aren't in Gryffindor. Red yarn is notoriously a pain to photograph.
Your Seeker,
Bleu...TurpentineChai
Thanks for the tips. I'm very ad resistant myself and immediately tend to look past most presentation save clear uninterrupted shots of the featured object, so it was helpful to read an article that helps me to understand how most viewers think.
ReplyDeleteSadly I don't have a child (thank goodness), a pet, or anything alive to hold my knitting. Well, unless I can convince my brother ...
Most cameras these days have timer features. You might be able to set up a shot and take a picture of yourself using that.
ReplyDeleteThat was amazingly - fascinatingly - interestingly - incredibly - helpful!
ReplyDeleteI love my timer feature on my camera! And the Macro setting too! This is a very useful and quite excellent tutorial! Thanks Bleu!
ReplyDelete